

Description
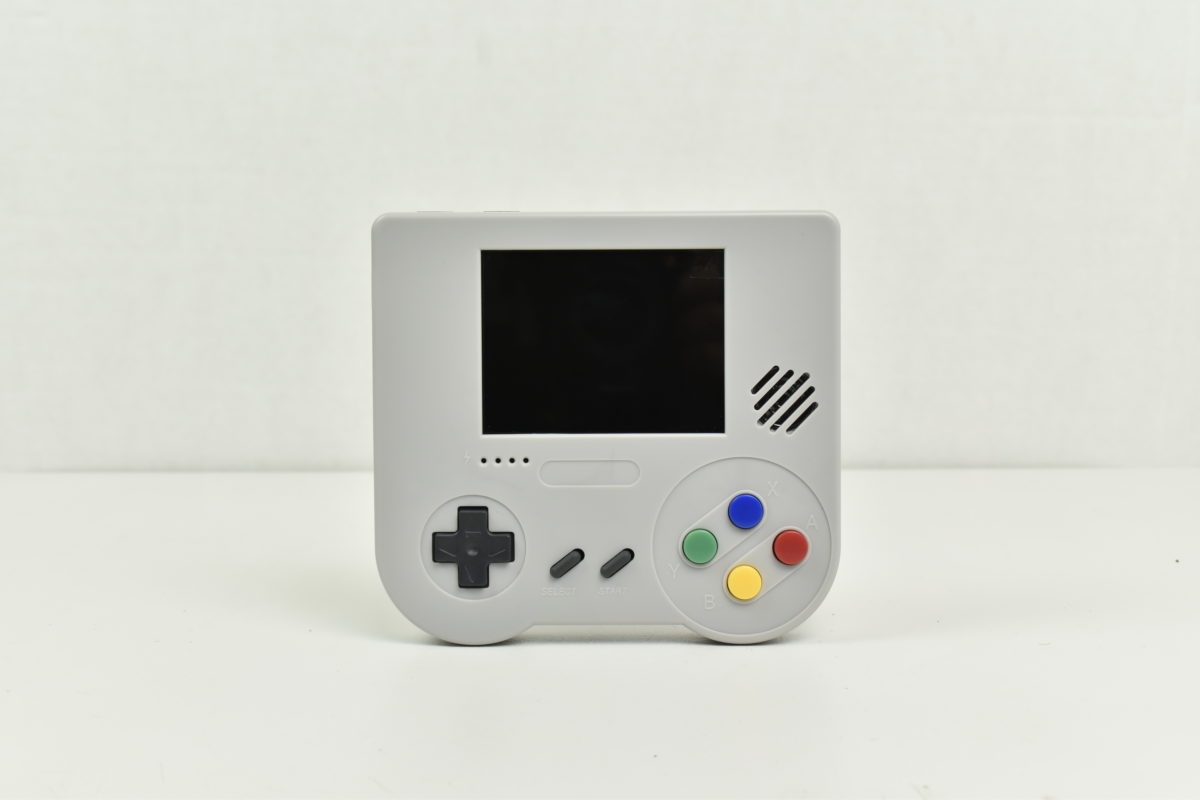
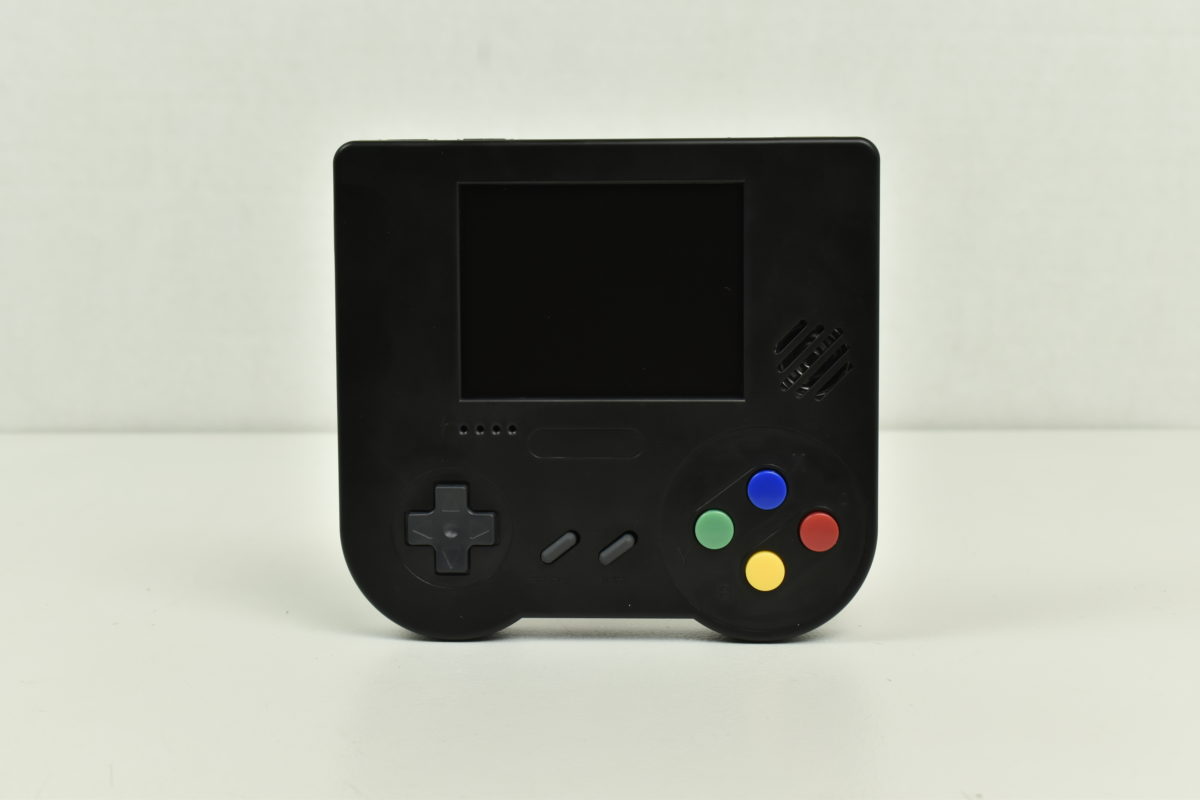
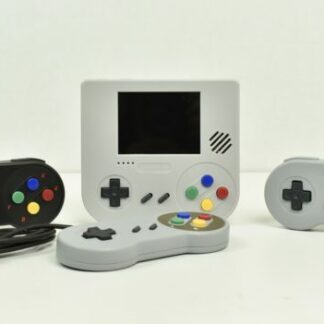
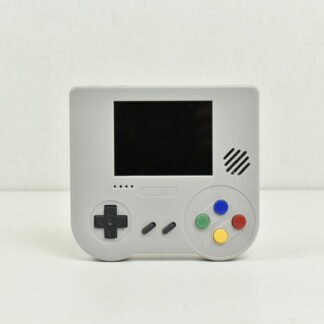
This is the basic Raspiboy kit (v1.3), best choice to make a handheld retrogaming console!
Please note that it does NOT include the raspberry pi zero (5$). (only component not included to make your Raspiboy). Check here to see where to get it!
This kit is compatible with Raspberry Pi Zero v1.3. Raspberry pi zero W works too but we advise using the regular Pi Zero for better battery life.
Please note that we ship from Shenzhen in China. For EUROPE customers, the VAT is INCLUDED.
For the rest of the world : Please note that we are not responsible for delays if your packet is handed to your country custom service. Some custom taxes may apply depending on your country. Any duties and taxes for international shipments are the responsibility of the customer. 8BCraft is not responsible for any extra charges once the original package has been shipped. If the customer refuses to pay these extra import charges, the return shipping and any additional fees will be taken out of the cost of the order, with any remaining funds being refunded to the customer. Please consult with your local import customs authorities about the import duties and taxes you have to pay before ordering.
Brian –
This is the easiest retropie kit ever!
First I was afraid of assembly, but after seeing the assembly video I decided that I could do it, and I was right! Tutorial is very clear and the built is in fact very easy! Nothing to be afraid of.
Thanks for this awesome project!
Oliver –
This kit is great.
The controls are all well placed and have a clearly defined pressure point. Possibly for one or another maybe a little bit too hard. But I like it in any case. Had no problems to controll all the games if’ve tried.
Ok, the resolution of the display can not keep up with current smartphones, but it makes an absoluley perfect look and feel for all emulations of older consoles likes snes, atari 2600 or what ever was buid up before the invention of hdmi. Sometimes less is more :-).
The assembly itself is quite simple. One small advise: At the final assembly both housing parts should be hold up edge. A little bit patience couldn’t be wrong. If you have to push harder to close the housing, you usually have a cable in your way. The assembly costs me about 10 minutes on the first attempt. The second time it is already faster.
It is definitely recommended to install the software before installing your raspberriepi zero in the Raspiboy. If you do not want to mess around with the “nano” text editor, usb-keyboard and hdmi-cable you should install an EXT3-filesystem-driver for your normal computer. Then you can open the Micro SD with the retropie-OS directly on a real computer with a usable editor.
Over all the raspiboy is worth every cent I’ve spended for it :-).
Nick B. –
I’ve had the modern black Raspiboy for a couple of weeks now. It is an incredible project, and honestly, even though there were some snags, everything fits and works right out of the kit.
Here are the pros/cons that I can think of, and something cool at the end. Keep in mind that even though there are a couple of tiny cons, it’s really worth the investment if you’re into retro gaming, and it so easy that a kid could put it together. I would recommend this to anyone.
“Cons”:
There aren’t really any – seriously. But, here are some tips:
1. Be careful during assembly. This kit is very, very easy to put together, but it is still an electronic device. I accidentally bumped the on/off switch the wrong way, and now it’s very loose (but still works). ***PLEASE NOTE: This was MY fault, the on/off switch works perfectly as it is and will probably not happen to you***. I’m just saying, exercise normal common sense when assembling electronics (unlike me!).
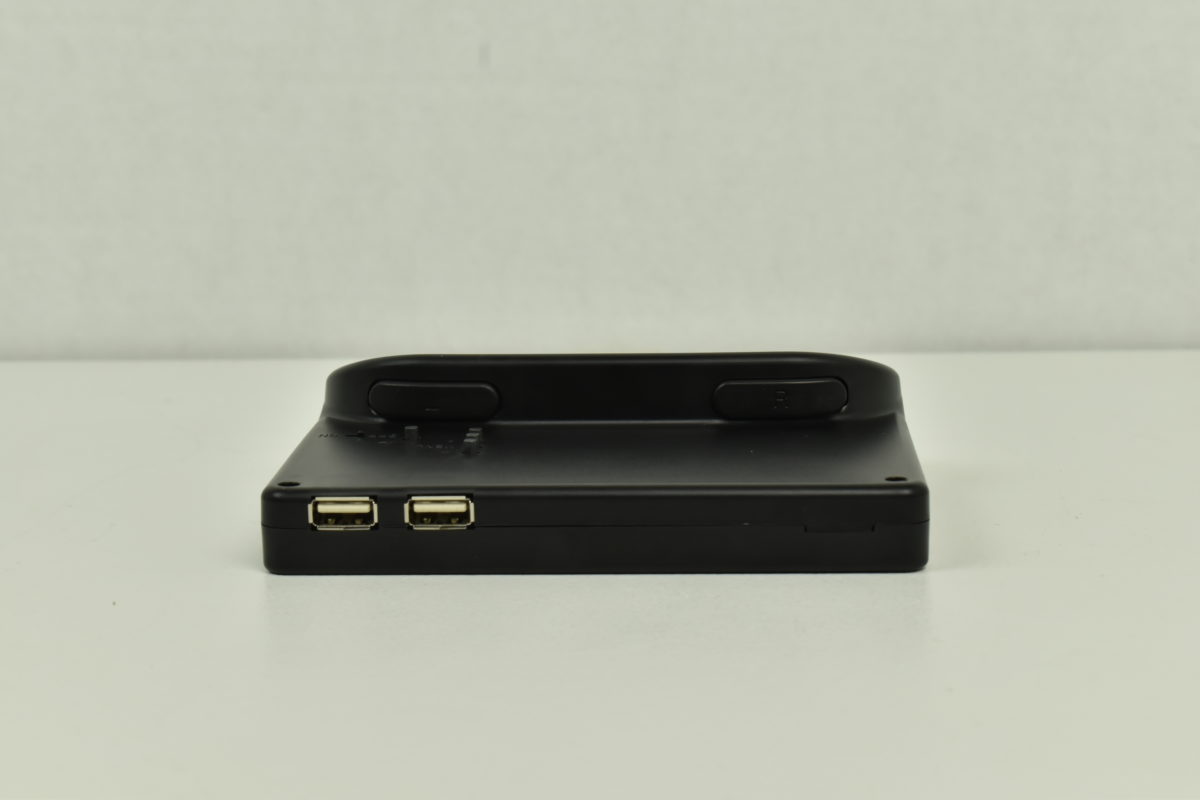
2. When you have assembled everything (using Pierre’s awesome tutorial, I hope), make sure you pay attention to the L and R buttons. They are the hardest part. I tried a few times before I got it right. Here’s the trick: when you get everything ready, hold the casing where it’s perfectly balanced – in other words, the squishy buttons and the electronic button pads aren’t going to both fall out. For *me*, that was holding it like a V shape right in front of my face with a bright light on it. Then, watch carefully to make sure the boards for L and R go into the slots exactly. Then, press firmly (but not hard of course) on the front and back – if something is stuck, it will be obvious because the two pieces of the mold won’t be flush. Then, screw in a couple of screws and try the L and R buttons. If they feel slightly clicky and responsive, you’re probably okay.
3. Do not get discouraged if your first assembly doesn’t work. I personally had to do it a few times because I was too impatient to start playing, haha. Just be gentle, and remember that the PCB has to make contact with the Raspberry Pi Zero, so you will have to screw in all of the screws and make a full assembly each time to test. If you only screw in a couple of screws and try to turn it on, it may not work because it needs to be pressed firmly together. That’s the best thing about the Raspiboy – no soldering! But, no soldering means making sure there is a firm connection, so remember – it’s awesome, but might take a couple of tries. It is well worth it.
4. Remember, the software is up to you. If your game doesn’t load, that’s not the Raspiboy, it’s the game, or whatever is running the game. Make sure you test this out *before* you install the micro SD card – you will have to disassemble it to change out the card (see the end of the review for a cool option though).
5. Pierre left instructions for what to do about the text size if you have issues with it, but there is only so far you can go (to my knowledge) in the actual games. This is a small screen size, and some games were not meant to be crunched into that aspect ratio. I have not found a decent tutorial for making text more readable inside of games (such as in an RPG) and some of the user interface’s text is still hard to read even with the fix, but you can still read it. The screen is just fine; this is the software.
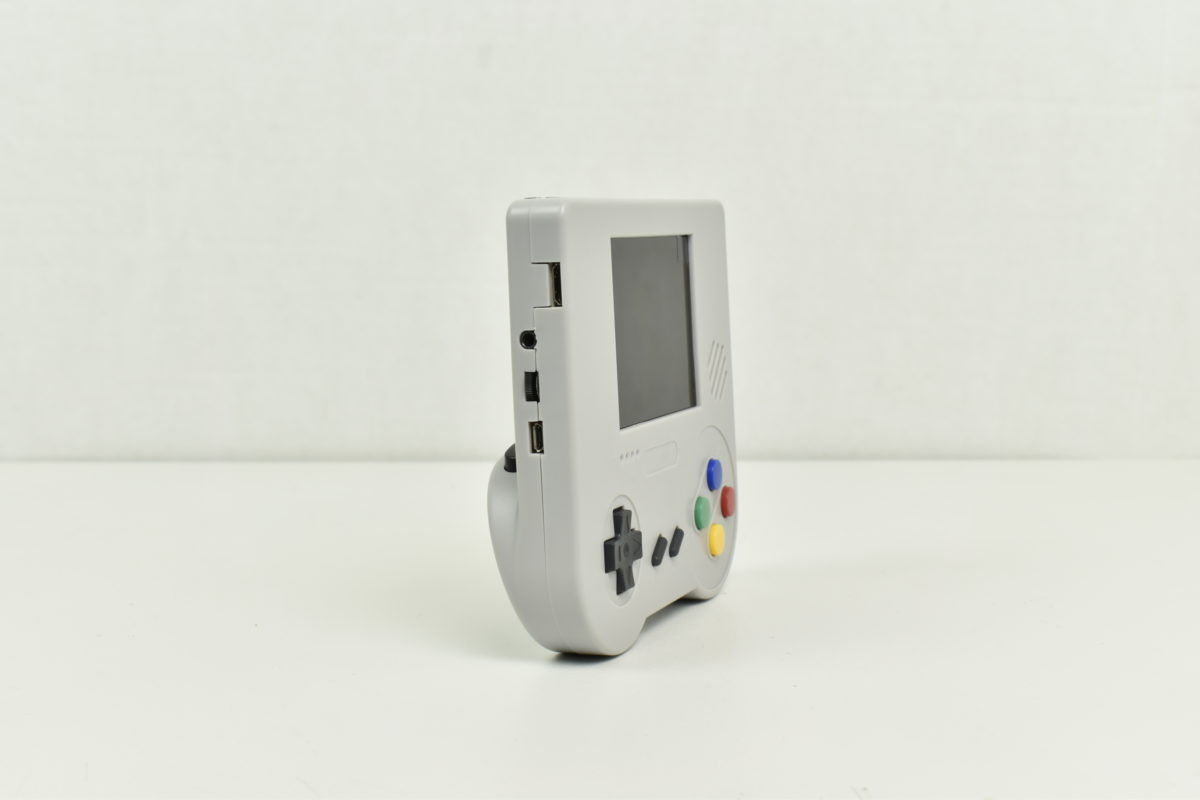
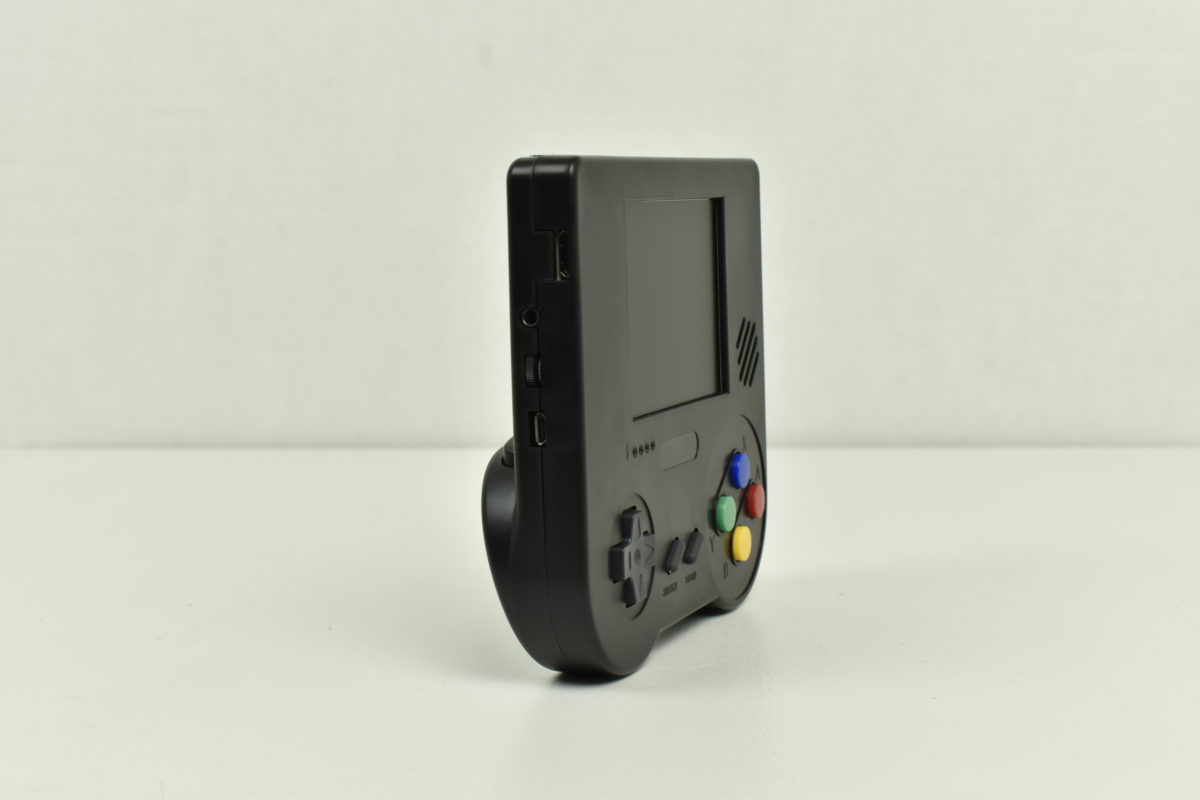
6. You will need a Mini HDMI-to-HDMI adapter to use HDMI connection with this. Also, the 3.5mm headphone jack will not output to composite video, but that’s to be expected, since the Raspberry Pi Zero was not designed to do that by default, and the 3.5mm headphone jack is part of the PCB, not the Zero.
7. Speaking of HDMI – some systems would not output to HDMI, but I believe that is the software, and NOT the HDMI out, because 99% of the time it worked perfectly. I’m not a master programmer or anything, so I probably just missed something. If this happens to you, do some research, it’s probably not related to the Raspiboy.
Now for the Pros:
1. Excellent battery life. I used mine lightly for two weeks after the first full charge before I charged it again. I’m guessing like 5 hours, but I might be low-balling it. This was the regular battery, not the high mAh one. It’s a micro USB charging port, which is super handy because you can usually just use whatever micro USB cord you have laying around. I’m not an electrician, but I think 5V should do it, and that’s what I’ve been using.
2. AMAZING controls. It comes with Super Famicom-style buttons and SNES-style buttons. for me, I chose the concave light blue and convex dark blue for the ABXY buttons (I have the black model). Everything is perfectly responsive and I have had absolutely zero issues with the controls on any game that I’ve played. I even got matching USB SNES controllers from Amazon because I wanted to make it a cool black and blue set.
3. The screen is great, and the aspect ratio is correct for most older games. The controls for the screen are extremely helpful, and a very nice feature.
4. The sound, even though it is mono (unless you’re using headphones, when it’s stereo), is awesome, and gets very loud. You may have to adjust some volume settings in your software to hear it (look up tutorials, it’s easy), but trust me, this thing has great sound.
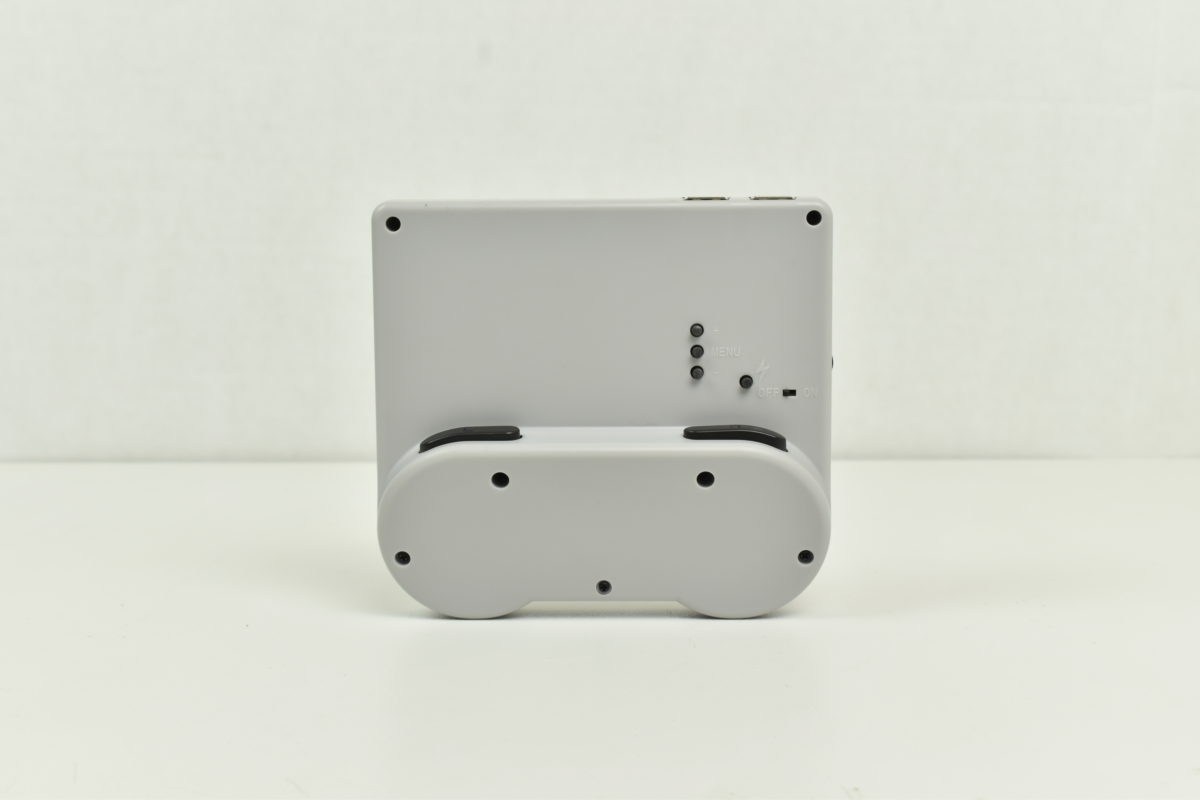
5. Extra features are well designed. The volume wheel is so, so nice to have. The headphone jack works with all of the headphones/earbuds I tried. The buttons on the back for operating the screen brightness/contrast/color are awesome and easy to use, and the battery indicator – it’s a must, and it works well for this. (It even matches my black and blue motif, coincidentally, haha).
6. The mold and overall design is outstanding. Everything just fits. Even the seam, when it’s fully assembled, is barely there. It feels great to play.
Cool tidbit:
I like to change out my micro SD cards regularly with my Raspberry Pi setups, so I was a little worried that I would have to take apart the Raspiboy every time I wanted to change things. If you are using the Raspiboy, you WILL have to disassemble it if you want to change the microSD card out with another one. However, I made a slight modification that allows me to change it out.
***I cannot recommend doing this, because it was just a random idea, I’m not a professional modder, and I had to cut into my case to get it to work. Don’t try this yourself if you’re not 100% confident and 100% safe with the proper tools***
Basically, I took a flat Micro SD (TF) to Micro SD (TF) extender cable, and ran it through the top left of the casing, back inside, then from the micro SD port on the Raspberry Pi Zero, underneath it, back over the top of the PCB, around the screw holes to the back, then folded it and ran it to another hold I made between L and R. Now, I have a small port between L and R where I can insert and eject micro SD cards any time I want. I tested it numerous times before doing this – the particular cable that I used has no data lag whatsoever that is noticeable, so I have had no problems. I did have to cut into the case, so there is a little bit around the ports I made that is ugly and I’ll have to patch it with silicon or something. If you do decide to try this, be extremely careful, and always use the proper tools and expertise, but I don’t recommend doing this on principle because even though it works for me, it might not work for you and might just end up damaging your awesome Raspiboy. All warnings aside, it really completes the experience for me, because now I’ll never have to take it apart again – I can just switch out micro SD cards any time I want if I screw something up.
I hope this helps. Pierre did an amazing job, and this entire product is probably the coolest thing I’ve ever bought. Please treat yourself to the Raspiboy.
Maxence –
We had to wait several months… but it was totally worth it. Pierre managed to create an awesome kit. Price is good, look is good, handling is good, … and (almost) everybody can easily assemble it.
I recommend this product for all retrogaming fans, this is in my opinion the best handeld console for retrogaming. Just a screen a bit bigger and it would be 200% perfect !
Toni Heimer –
I am playing this awesome device since many days now and got addicted to it. Fortunately I had completely no issues and everything works great! Well done Pierre!
Regards
Toni
Morreale –
Superbe petite console dont le montage est un jeux d’enfant : aucune soudure avec le rpi zéro.
Le seul problème que j’ai rencontré a été résolu facilement : les boutons gâchettes on nécessité d’être rempli pour qu’il y ait un meilleurs contact.
David –
I’ve wanted to build a portable RetroPie setup for a long time now but was intimidated by having to source custom boards, 3D printing parts (even though I have my own printer), waiting for speciality components, and the great amount of modifications needed to the shells. I consider myself DIY-capable and tech savvy but simply did not want to dedicate the time and frustration to such a venture.
The Raspi Boy is the first kit I bought and if you asked me, I wouldn’t have guessed it came from one engineer in France, instead of a whole company. I had it up and running within 20 minutes of sitting down to assemble it. Now with experience, I probably could build kits in 10 mins. There is no soldering, no wires, no anything. All the wires use JST connectors and the custom PCB connects to the Pi Zero using pogo pins.
The thing you will spend the most time on is tweaking the software, but this is true of any RetroPie setup. The only thing you *must* do for the Raspi Boy (software wise) is add 1 new line and modify 4 existing lines in the config file. That’s it.
The controls/buttons are some of the best I’ve used. I just put together a Gameboy Advance Pi Zero and the buttons and d-pad are so mushy and get stuck. The Raspi Boy buttons are very crisp and have clean actuation.
The screen on this thing is great. It’s nice and sharp and once you pick the right theme (I’d recommend the GBZ35 theme) and make some tweaks, you’re golden.
Finally, it has the added bonus of having a LCD control interface which I’ve only seen one other time in a portable custom setup. Most setups have no brightness or contrast controls at all.
Now for the cons – the shoulder pads are slightly difficult to get aligned and installed the first time. I am a pro at it now so can do it pretty quickly. The speakers are really terrible even if you make adjustments in software. There are some manufacturing defects in the plastic which don’t affect performance but may be unsightly for some. It has strange behavior if you want to output to HDMI and you cannot charge and play.
Despite these small shortcomings, I am extremely satisfied with the Raspi Boy and especially Pierre for doing an amazing job engineering it. Bravo!
Wesley (verified owner) –
it took about 3 months to receive the items. It took me about 2 hrs to put it together, its the shoulder buttons that kept mis-aligning. I finally followed pierre’s video tutorial and snapped everything together. I would say the tricky parts of the assembly are the battery placements and the shoulder pad bumpers, frustrated the hell out of me and I even had to re solder 1 of them back due to mis handling, so be careful! Overall this was a delightful learning experience which I highly recommend to all retro gamers!
i am now a happy owner of the Raspiboy and started playing legend of zelda, moonwalker, metal slug x,etc the list goes on..
Thank you pierre for giving me this chance to re-live my childhood! My 2 sons absolutely love it too! 🙂
Nicolas (verified owner) –
It’s just better than a (Super) N******* Classic Mini or any current commercial retro rebranding. Cheaper, multi-platform, and portable!
The assembly is very simple. Only the case closing is “a bit” tricky (damned shoulder pad bumpers ;-)). Once assembled, ergonomic and quality feeling are very good.
Retropie is working like a charm and the raspberry pi zero is able to emulate almost all the good consoles and arcade machines before the N64. The extra USB ports are very welcome: Wi-Fi, BT, extra storage, extra game controller, etc. Multi-player on a portable console is just fun.
You can even use it as a home console thanks to the HDMI port. A little drawback on this very last feature: you can’t charge the battery while playing (maybe in the future?).
The last and not the least, every parts can be replaced. This product would get an awesome repairability score on iFixit. By the way, the super maker of this product is super cool and truly available for his consumers.
GG
Admin –
Thanks for your review!
Yes charge and play will be enable with the 2nd production revised PCB that will come in about 1 or 2 months !
Rob Mitchell (verified owner) –
Lovely kit, had an issue initially with the PCB supplied. Pierre sent me a replacement and its working great now.
I’d recommend the kits be sold pre-assembled with the option to be able to get to the SD card with the unit assembled, would make Pierres life much easier!
Highly recommended!
Sujit Kumar (verified owner) –
This is the easiest and the best open-source retro console out there. Kudos and Hats off to the 8bcraft team(Pierre) for having put this kit together.
The kit was very well laid out and easy to assemble.
Highly recommended !
Juffer (verified owner) –
This kit is really impressive – very easy to put together and use, however the case can be a little bit fiddly to put together at first.
Once up and running it works like a dream, the joypad is responsive and the volume can be cranked very high.
If you’re wondering whether this is worth the money I’d say definitely 🙂
Michael –
My review can be found here https://youtu.be/PDoApXONhnE great piece of kit!
Rick Reynolds –
Love my raspi-boy. The kit was a bit of a challenge to assemble (read the above review by Nick B – my results were similar). But it’s definitely doable and the result is SO worth it! I love being able to play accurately emulated Intellivision games on the go!
I was very excited to read this morning that Pierre has produced a new board that will allow play while battery charging! That will be great as well – the ability to plug it into power and play games on a TV like a dedicated console is all that was missing from this project.
Jason Allred –
Awesome. Portable. Nostalgia.
Mario Osman –
I love it! The easiest way to build your own portable Pi Zero. Was so excited when I was a backer and now I’m more excited to own it^^
Adrien –
Great kit ! Really nice to play old games where we want, alone or together on a TV ! And a pleasure to build !
Un kit vraiment sympathique, pouvoir jouer aux jeux de notre enfance, où on veut, seul ou à plusieurs, est génial ! Plutôt facile et gratifiant à assembler, super !
Jae –
Awesome project. Took me a minute to understand the software mods because I have zero software knowledge, but I figured it out. Hardware was much easier. I built the first for my son , now it’s My turn. Great fun !
Mark Bessert (verified owner) –
D pad sucks. Plastics around screws breaks if you put them in a few time. Wasted my money.
Samantha –
I absolutely loved Pierre for his hard work and how he went out of his way to reassure his supporters that he didn’t try to scam anyone when delays started happening in the factories. That aside, this is an awesome project (but slightly difficult for a dummy like myself that doesn’t know software). Before buying please make sure to do some homework on which programs to download or which lines of code to change before you assemble the project. Assembily isn’t difficult (to be honest, the screen connector was the most difficult since you can’t see if it went wrong until after the whole thing is put together), and it was all around pretty fun. I would definitely recommend trying it out!
Stevo –
Beautiful little kit arrived almost entirely assembled. Thank you for putting so much thought into this~
Marc (verified owner) –
Facile a monter et des heures de fun ! Ce kit est vraiment sympa pour jouer à la fois dans les transports et sur un écran.
Une bonne idée bien réalisée !
Rett Goings (verified owner) –
My Raspiboy case came cracked. I can’t use my unit.
I contacted the owner a week ago about it an haven’t heard back from them.
I make prototype injection molds for a living. The cases are junk made on cheap Chinese molds.
Jonas –
Got my Kit and assembled it in around 20 minutes, works properly and it’s very enjoyable to play on it. Buy it if you want to enjoy the old games you loved in your childhood.
Patrick –
Just got my Raspiboy Kit last Week.
The assembly is quite simple, but iIneeded two tries until all the Buttons had a perfect pressure point. I’m sure if you are a bit more patient than me you can assemle it with the first try. 🙂
For me the “gbz35 / gbz35-dark” theme for emulationstation is the best choise for this screen.
Overall, I am extremely satisfied with the device and can recommend it to any mobile retro gamer!
William Sackis Netto (verified owner) –
I just love it!! The buttons feels like the original!! Once you learn how to load roms and change themes via usb it gets super easy!! I fully recomend!!
Mark Bessert (verified owner) –
You product sucks. You only post positive reviews. That’s not very honest.
Laplume –
J’ai reçu mon rapsiboy avec le PCB H.S.
j’ai remonté le problème et il m’ont envoyé rapidement un PCB de remplacement.
tout fonctionne correctement.
L’assemblage est facile à faire.
J’ai configuré un Recalbox 4.1 , tout fonctionne implacablement bien.
Merci !!!
Francois –
Hi All,
My raspiboy was delivered with a faulty PCB card. I got a new one shipped without any problem and now, I can play again with my “old fashioned” arcade games.
Very quick and worth full support , even in my mother tong language (French).
The mounting of it is quite simple, even the soldering of the additional USB is easy to be done.
Thanks a lot to the 8bcraft team !!! You do a great job !!!
Best regards,
Luis Custodio –
Got mine running with Pi Zero W and it’s working flawlessly.
Does everything it’s supposed to do and it’s a great buy for having fun solo or with some mates. I suggest using the W. The conveniance of plugging extra controllers via bluetooth is too good to ignore.
I also suggest installing everythin on the upper half of the case, like ETA Prime suggests. Even the battery. I also put the rubbers for the shoulder buttons in place and then just drop the back lid on top.
Only nagging thing is I find the diagonal moves a bit hard to register, because of the straight design of the cross in the case.
Pierre is fast to respond and help. I just don’t give it 5 stars because deliveries ain’t as fast as he is, but if you have the patience just commit and buy. It’s a great purchase.
Cheers
Ali jugas –
Not Received >:( Horrible sellers
Lily (verified owner) –
This product is amazing! Shipping was nice and quick and putting the thing together was really easy. The controls are great and the game Library is huge.
Brian Manguso (verified owner) –
Best handheld pi zero you can buy. Great price and super easy to build
Stefan –
Best raspberry pi handheld ever!
thank you!
Sascha –
Really great device. So happy about, I’m feeling like I’m 12 again 😉
Rick Reynolds –
I’m very happy with my Raspiboy. I was a kickstarter backer, and the unit has held up to my expectations.
My favorite retro-console to play on is the Intellivision. And while the support for Intellivision in RetroPie isn’t as polished as other retro-systems, this is the first handheld I’ve had that gives me a great portable Intellivision gaming experience. I can put my games on there and have wonderfully accurate emulation with the jzintv emulator. And with a little Linux hackery, I can map the gamepad controls for each game the way I prefer. I can now take my favorite games with me on the go — something that fans of other retro-gaming systems have been able to do in other forms for some time.
The kit is pretty simple to install – no soldering, as advertised. As mentioned in guides and other comments the final closing of the case can be tricky, but I was able to get it right after a couple of tries.
I love that the newer PCB allows for running of the system while plugged in. That allows the Raspiboy to double as a gaming system when connected to a television via the HDMI, power plug, and a USB controller or two. It’s my new favorite retro-gaming gadget.
Arnaud –
Very nice kit for retro gaming with a Raspberry Pi
I recommend this project and I hope it will continue to evolve.
Pierre is very reactivated to answer our questions, he is a serious person.
Only the delay is very longer, just be patient for receive your kit.
Thank you again.
Roni Laukkarinen –
My story with RaspiBoy (TL;DR; to the bottom if you are not a fan of reading praise):
When I first saw Pierre’s invention on Kickstarter, I backed immediately. I’ve backed at least one unsuccessful project earlier and lost money, so was a bit sceptical, but as soon as I noticed Pierre was informing us on weekly (sometimes even daily) basis, I was so thankful and happy about the project. We got to see first hand what’s happening, from manufacturing molds to production.
When I got my first kit, I was so excited. There was much to learn so wasn’t careful with the first PCB so fried it before getting to play anything. Emailed to Pierre and he answered instantly and told me what to do, even sent me the replacements. Pierre’s helpfulness, kindness and general professional attitude about everything is beyond awesome! Wasn’t careful the second time either, but learned through mistake; you should not connect battery to speaker port in hangover, haha. Pierre understood this and ordered V1.2 from him. That PCB is the king of PCBs and everything is working smoothly now.
RaspiBoy is my first handheld retropie console and man I’m in awe. The thing is awesome and contains all my favourite games on Amiga, Atari, C64, SNES, GBA, Sega and even DOS. Only imagination is the limit.
TL;DR; Long story short:
I can recommend RaspiBoy and 8bcraft from my whole heart. Pierre’s dedication in this project is out of this world. I’m really glad how everything works. This thing brings me joy to me and my pamily for a long time at home or during travel. All the best games in compact mode, like they should be.
Jerry –
I Really enjoy My Raspiboy. I cant express enough how GREAT the service is From Pierre and his team. I take mine with me everywhere. I need to buy a few more as one around the house doesn’t seem to be enough. My build Is a 6000mh battery and a 64GB Micro SD Loaded with arcade games and the usual old school systems. Also installed Kodi and the Pixel desktop. I hook it to the tv with the mini HDMI, wireless keyboard and USB drive with movies loaded when we go on vacation. WAY TOO COOL! THANKS Pierre!!
Niki Koh (verified owner) –
Love every bit of it! Very well made, doesn’t feel tacky. Really easy to assemble as well! Thanks Pierre!!
Martin –
Great product and fantastic support from Pierre! THX a lot!
Roy –
This is a great product. Not only is it a portable game system for all my childhood favorites, but it’s also a great way to get into learning about the capabilities of the Raspberry Pi.
The kit comes with everything you’ll need short of the pi0, and goes together easily with a bit of patience and care. The unit itself feels solid, and the size is close to the SNES controller it’s laid out after and the thickness of the old brick Game Boy. The software and roms go on fairly easy following the tutorial, and you’re good to go from there.
If you want to get a bit more advanced, you can make this thing shine even more. Things like taking the time to scrape all the game data for box art, and learning how to do some text editing to make the various themes have text resized for the small screen add character over the default interface, and you can take things further with DIY mods if you wish.
A couple assembly tips:
1. I put a piece of electrical tape over the end of the screen where the pi0 sits. The metal back of the screen was a bit close to the pi0 for my liking.
2. The silicone buttons for the shoulder buttons can be tricky. I found that resting them on the front piece of the case and putting the back over them makes it easy (make sure to tilt the back a bit so the shoulder buttons are out when you put it on. The slots for the silicone buttons are on the back, but they’ll go in easily. It’s better than fighting gravity.
Liam (verified owner) –
Received it (Eventually) and the screen does not work, sent a replacement PCB board, still doesn’t work. It’s overpriced and feels super cheap I’m done with it straight in the bin. You’re better off just doing a bit of soldering and getting something that works and feels much better quality than this.
Michael –
This is a great product, easy to put together and set up, very good price.
My raspiboy was delivered with a faulty PCB card. I emailed Pierre and got a new one shipped without any problem.
Bernard (verified owner) –
j’ai commander le raspiboy après avoir longuement étudié ses possibilités, je suis sur raspberry pi2 et 3 depuis deja un certain temps, mais avoir une console retro sur cette base me plait beaucoup. Une fois commandé après une petite peur sur les délais de livraison, tout est parfait! Le numéro de suivi est envoyer en temps et en heure, il fonctionne sans soucis. Arrivé l’heure du déballage: emballage parfait, état de l’appareil et du pub nickel, rien à redire, on prépare la carte en suivant les instructions du site….On assemble le tout (le plus dur est de refermer le raspberry, c’est tout dire!) et là, miracle TOUT fonctionne parfaitement, je suis peut être chanceux, mais je n’ai que du positif à dire sur cet engin, alors oui, le raspberry zéro ne peux émuler que des consoles rétro si on veux une bonne qualité d’émulation, parfois le son lag un peu sur certaines romps (mega drive et gameboy advance) mais tout les jeux ont parfaitement répondus, je suis ravi, encore bravo!
Rob (verified owner) –
Great little unit, very easy to put together and setup. Works great. My only issue is the form factor could be more aesthetically pleasing, but having a simple look like it does would keep cost down and make it easier for raspberry pi new comers to assemble. Would recommend.
Trevor –
Great bit of kit, I had a faulty PCB board but Pierre sent out a replacement and it’s now fine. Really easy to put together. Now my tube journey to work is retro-filled fun
James (verified owner) –
Amazing little device that works perfectly. It doesn’t take long to assemble with the easy to follow instructions. Have fun gaming!!!
Rob (verified owner) –
There was a small issue with my game pad not working but Pierre immediately addressed the issue and sent me a new one ASAP. Unit works flawlessly now. Very excited to see your future products!
Caous –
Superbe console:)
Le montage est assez simple dans l’ensemble, j’ai eu un peu de mal avec le branchement de la nappe du lcd mais maintenant tout fonctionne .
Encore bravo a Pierre pour son projet.
Selmar –
Nice and easy kit to essemble. I had some problems with some faulty boards being a kickstarter backer. However, Pierre was always, without hassitation, willing to send a replacement to me without additional costs. Now I have a fully working raspiboy which works really well. Thank you!
Daniele –
Easy to assemble.
Basically, it is as to have a portable snes.
Great the support from 8bcraft team.
Giuseppe –
Despite making sure to follow all instruction with the most care I am not able to get controls to click consistently. The D-Pad down button must be pressed very hard to be recognized and the red button seems to be enough to the right to overhang the control board. From the colored buttons 3 are ok, but one is very mushy and needs to be pressed strong. Even when shimming up the control board and to try to make better contact with the carbon points the presses are not recognized consistently.
One Shoulder button is mushy as well. I don’t understand how the slot for the rubber piece of the shoulder buttons is placed such, that the axis of the rubber point is not aligned with the dot in the shoulder button. There is more than enough space for a better placement and frankly it looks like a poor design choice.
One of the two white connection cables to the shoulder buttons was broken right out of the bat and Ihad to resolder it.
The screen is VERY pixely not at all a good DPI and the aliasing is horrible. I ordered the version with 3 extra controls but even though they are preassembled they suffer from the same inconsistent pressing issues.
Maybe I’m wrong by expecting a hassle-free retro-kit but this product is in my eyes not ready yet. If I could I would want my money back, honestly.
Admin –
Hi there,
Sorry about this bad experience.
About the gamepad problem have you checked if wires of L/R are not stuck under circular shape of the back casing when you close the casing? If wires are stuck there will be too much pressure on the board making buttons not responsive.
If it is not the case then it must be a problem with the silicon or the gamepad PCB you can contact me by email for replacement. Also if you have part broken out of the box you can ask for replacement of it.
About the LCD raspiboy use the composite signal of the pi zero, which flickers a bit, but that’s not hidden fact.
About the gamepads, they all have the same issues? This is rather strange that your 3 gamepads are defective maybe there’s something wrong with this batch. Can you contact me by email with your order number? NOK parts should be refunded of course.
Keeley –
Very happy with my raspiboy. Had a few teething problems with a dodgy pcb board but the guys at 8bcraft sent a replacement pcb and sorted it out. Postage takes a while but other than that I have no complaints. I’m a very happy gamer. Pierre takes the time to reply to emails personally and offers advice and solutions with my problems. Excellent customer service. I will definitely be looking into purchasing the retrostone.
Bernhard –
All in all I’m really satisfied with my Raspiboy. The assembly wasn’t too difficult, however, I had to replace some faulty parts (speaker, gamepad module) and I also upgraded to the new version of the 8BCraft PCB as I got a discount on it as a Kickstarter backer. The replacements for the faulty components were provided by Pierre at no additional costs. Installing the new parts improved my Raspiboy a great deal: the static on the speaker as well as the interference of the screen (which was probably caused by the faulty speaker as well) are gone and the gamepad works better now (I guess this is because the contact areas for each button on the new gamepad module are bigger). Also I can charge and play now at the same time.
Of course there is also some room for improvements:
– While the screen is sufficient for playing retro games, a slightly better screen wouldn’t hurt. Reading small text in emulation station can be quite hard (if not impossible) and using the GBZ35 theme recommended by Pierre is a must imho to operate emulation station properly on that screen.
– The weird pattern shown on the screen when using the HDMI out or after shutting down the device (but before switching off the power) should be fixed (i.e. just turn the screen off when there’s no signal).
– The battery life of the Raspiboy is really good but the battery also needs a great deal of time to be fully charged (sometimes charging it over night is not long enough).
(- Some people get a bit annoyed by the clicking sound of the buttons when I’m sitting next to them playing the Raspiboy. Maybe there is a way to quiet the buttons down a bit. Personally, I think they are not louder than other gamepad buttons…)
All of the things mentioned above are really only minor issues. The Raspiboy is the best portable emulation device for retro games I have encountered so far. It has a great form factor and especially the integrated snes gamepad sits very well in my hand. The assembly tutorial was very well made and Pierre was very helpful during building the device. I also really enjoyed his progress updates during the Kickstarter campaign, so I recommend backing one of his future projects if you get the chance.
If you are looking for a device to emulate 8/16bit retro games the Raspiboy (or its successor the RetroStone) might be worth taking a look at.
Eric (verified owner) –
Félicitation pour le Raspiboy ! c est une belle réussite, cela va me permettre de passer d’agréable moment dans le train (s’il y a des trains … ). Pour l’assemblage, les boutons L et R m’ont un peu posé problème mais en suivant les instructions et en assemblant les 2 en “V” ça passe bien.
Les boutons à l’arrière permettent de choisir la luminosité de l’écran.
J’utilise un Raspberry PI 3 avec retropie, je pensais que le Pi Zero serait juste pour émuler la S NES mais non. Maryo Kart fonctionne bien.
L’assemblage est astucieux, le dirigeant (Pierre) est disponible … longue vie à 8B Craft 🙂
Eric
Matthieu (verified owner) –
This kit is great ! If you’re a huge fan of retrogamin, just go on :).
Plus: If you’re interested in game programming, try to install Pico8 on this handeld system, you will like it even more ! 🙂
Admin –
Thanks for your comment! Do you have a link how to install pico-8 on retropie? Maybe you can share it on the forum 🙂 forum.8bcraft.com
Pierre
Garrett (verified owner) –
My original unit stopped working after accidentally turning it on during a very hot day in a car however they provided a free replacement pcb after the original stopped working and now everything is working just fine.
Good product and even better service
tarekbaher (verified owner) –
This is a great unit and my whole family loves it!
One day it died and Pierre provided me a replacement PCB.
I am probably going to order another one soon as my wife also wants one.
Great console and excellent service!
Rob & Zephaniah Bayliss (verified owner) –
PiBoy works well when assembled properly. We had problems initially but LCD ribbon was not clamped closed, and all screws need to be fully tightened. Once all components removed and reassembled it all worked fine. D Pad needs pressing hard to make proper contact, but this is a minor observation. my 12 year old son helped assemble kit, and is very pleased with his new game module. He has downloaded over 600 retro games, and is happily working his way through them. Pierre was very helpful and responsive when we had difficulty making the kit work.
Lasse (verified owner) –
Awesome product, when it works.
First the screen didn`t work. Had a bad connection to the pi. After changing the pcb, and tryed few pi`s, it worked. But the buttons did not work as well as the should.
So after few messages I got a new button board, and after that it works.
So it was not so easy, but finally works. The grafting is littlebit tricky, and can make you mad few times. But if you got some McGyver-skills, it should be a big problem. If you dont. Do not panic, you will learn them on future.
Even there were problems, Pierre (the dude who made this) was very helpful and patient on all time.
So thanks again Pierre.
Sergio (verified owner) –
At the beginning I had problems with PCB but Pierre sent me a new one and now it is working perfectly. Raspiboy is the perfect partner for my bartop. 🙂
frederic (verified owner) –
Totalement satisfait, produit correspondant à mes attentes. Tuto d’assemblage clair. Le raspiboy s’assemble sans problèmes et les divers éléments s’emboitent parfaitement.
Équipe à l’écoute et réactive. J’aurais peut être préféré un écran de meilleur qualité, mais franchement je chipote.
Encore merci à 8Bcraft
Antony –
really nice! and thanks for the very quick support 🙂
Jackson –
I really love the Raspiboy, and how simple everything is. I ordered almost a month ago, and it still hasn’t shipped at all. How long does the shipment usually take? I live in San Diego.
Admin –
Hi there,
It’s because it was currently pre-order, new production of raspiboys will be ready to ship the 21st of September.
amaury –
Great Job ! Better then expected, Many thanks 😉 easy to assembly even though I’m a beginner in the rasbery/retropie world.
On the first place a bit scared as my raspiboys were lost by the French post office. Quick support from Pierre 😉 I finally my package has appeared again.
All the best! And keep us posted on future projects
redmond007 –
It works, but build quality is not very good. Threading of the screws is loose and does not fit the case uniformly, which is an indication of bad build quality.
Admin –
Hello!
About the screws, it’s because there are two kind of different screws.
– 3 smaller screws, these are used for pre-assembly and come on the Raspiboy. They are smaller so it won’t damage the screw hole and just hold the unit together after pre-assembly of the kit.
– 7 bigger screws inside a plastic bag. Those screws are slightly bigger and are for final assembly.
I think you are talking about the pre-assembly screws. Best is to use the screw bag for assembly.
Have a good day
Pierre
Chad Geister –
I kickstarted the version 1.3. After some difficulty with customs, Pierre made it right and sent me a replacement. It arrived promptly at that point, assembly was very easy and effective. My son is playing it with a large degree of wonder as I type this out.
A few points to help clarify the whole process.
First, I had the image for the Raspberry pi 3 on my computer, so the initial flashing didn’t take. After fixing my own ineptitude and grabbing the right image to flash, everything worked fine.
Second, I was so rusty with the command prompt, it took me far longer than I want to admit to get the font size commands to work. I was missing some spaces in the command line.
With those two issues resolved, everything has been great with it. It took a long time to charge, but it is a huge battery, which will be great on long car rides with the kids (6+ hours). It really brings back all the old memories of handhelds from when I grew up in the 80’s and 90’s, and I really appreciate being able to share that with my kids.
Michiel –
Hey,
Evertthing works good and is really Nice tot play some of games on thé go.
But i Cant figurout how you save thé game I have done this a few times with the in save option and with the software itself then you have to push left and right or something but this does not work someone who knows why this is?
Greetz